
How to Translate a WordPress Plugin
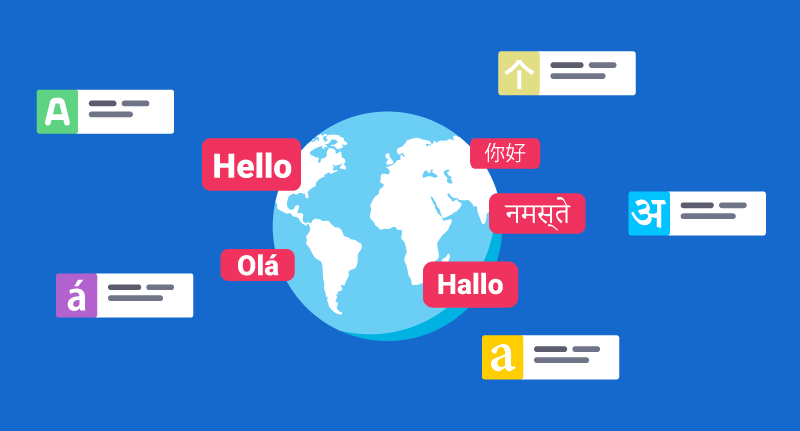
One of WordPress’ best features is the thousands of plugins for you to choose from. Whatever functionality you want to bolt onto your site, there’s likely a plugin available to help you do it. However, the vast majority are in English only, which means options are limited for non-speakers of the language.
To help bridge the gap, you can contribute by helping translate plugins (if you’re multilingual), whether it’s for your own use or for others to benefit from. In this post, we’ll talk more about why you should contribute to plugin translation. Then, we’ll walk you through how to translate a plugin in just three steps.
Let’s get started!
Why (And How) to Contribute to WordPress.org Plugin Translations
If you browse the WordPress.org Plugin Directory, you’ll notice that a lot of plugins are available in multiple languages. In some cases, those translations are the work of the plugin’s own developers. However, more often than not, the users themselves do the bulk of the work.
Contributing to a plugin’s translation via WordPress.org is very simple. You can translate as many or as few strings as you want, and it should only take a couple of minutes of your time to make suggestions. Ideally, hundreds of users will come together to create a full translation other people can enjoy.
It’s a win-win situation for everyone. You get some practice in another language, other users get to enjoy a plugin you like, and the WordPress community grows. Plus, you get a nice, warm feeling after helping out!
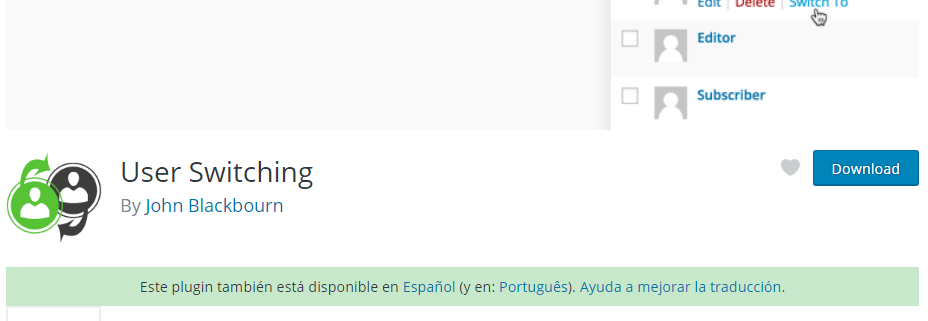
To start contributing, firstly register for an account on WordPress.org. Then, visit the page of a plugin you like and look a line reading “This plugin is also available in X language. Help improve its translation” (here, you’ll see that line in Portuguese):
If you click on the “Help improve its translation” link, you’ll see a list of all the languages WordPress officially supports. Next to each language, there should be percentages representing the progress of each translation for the plugin:

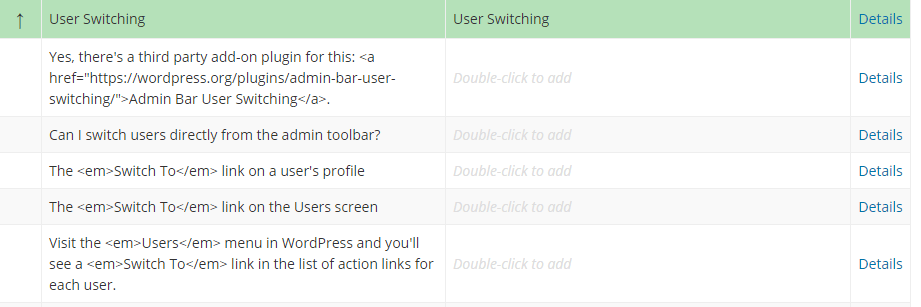
Clicking on one of those percentages will show you a list of strings, including those that already have accepted translations, and others awaiting for input:
If you click on one of the strings without a translation available, you’ll be able to add one yourself using a basic editor. Your suggestion will then be reviewed by a member of WordPress’ Polyglot Team. Once approved, the plugin’s translation percentage will increase, making it one step closer to being fully translated.
How to Translate WordPress Plugins (In 3 Steps)
There are two ways to approach plugin translation for the plugins you use. One involves creating translation files, telling WordPress where to look for them, and using an editor. It’s a lot of work, and you can save yourself tons of effort by using a plugin such as Loco Translate instead, which can provide you with the same results. In this section, we’ll focus on the plugin approach.
Step #1: Install Loco Translate and Pick a Plugin to Translate
We chose Loco Translate for this tutorial since it’s by far the most feature-filled translation plugin for WordPress. It enables you to translate plugins and themes on your site to any language you want, and includes a built-in editor, so you don’t need to download any other tools:
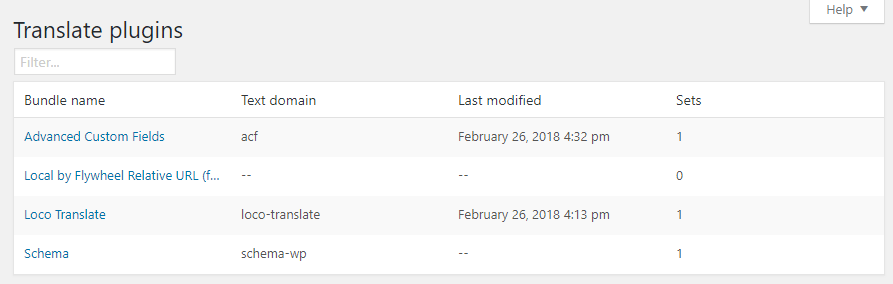
To get started, install Loco Translate as you would any other plugin. Once it’s active, look for the new Loco Translate > Plugins tab on your WordPress dashboard. Inside, you’ll find a list of your plugins, including both active and inactive options:
The rest of this step is simple – click on the plugin you want to translate, and move on to step number two!
Step #2: Pick a Language and Create a po File for Your Plugin
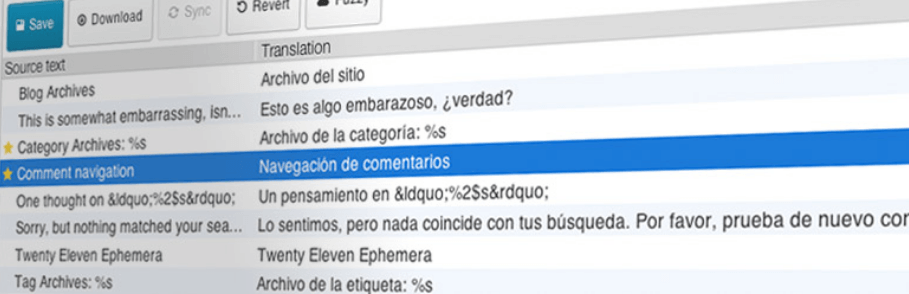
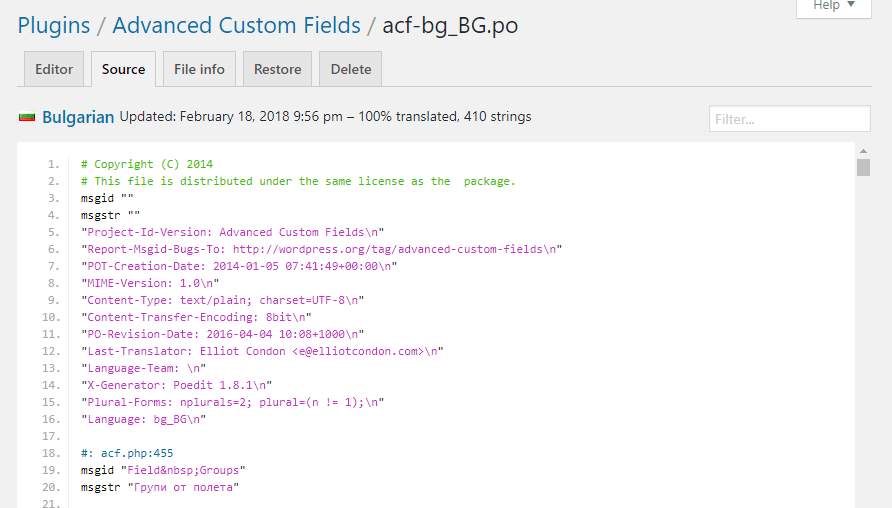
After you choose a plugin, you should see a list of all its available translations on the next screen. You’ll notice each language has an associated file with the po suffix. Po files are where you store plugin translations in plain ‘strings’, which enables WordPress to pull the text it needs depending on the language you set for your website. Here’s an example of a po file:
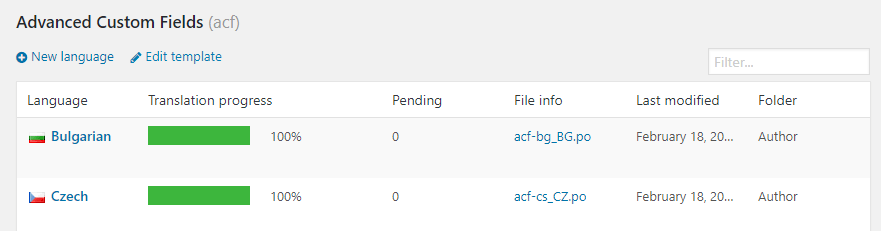
If you chose a popular plugin, there should be a lot of translations available for it. In any case, you can add new languages using the New Language button at the top of the screen:
Next, pick a language for your translation and choose where WordPress should store the new po file the plugin will create for you:
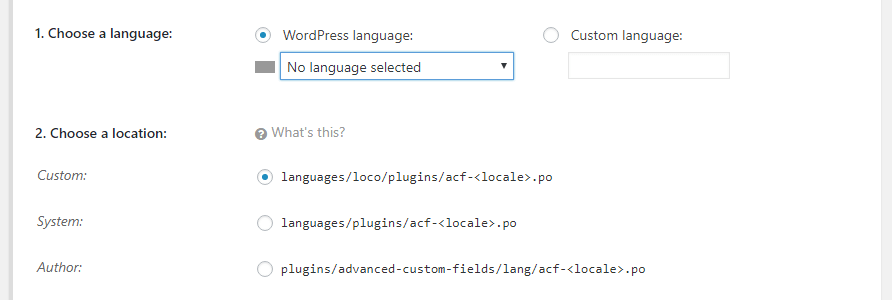
We recommend using the Custom location, so your po files don’t get overwritten when you update the plugin in question. In any case, click on the Start Translating button when you’re done, and move on to step number three.
Step #3: Get to Work on Translating Your Plugin’s Strings
As we mentioned earlier, Loco Translate comes with its own built-in editor. After you choose a language for your new po file, Loco Translate will compile a list of strings for the plugin you want to translate, and send you to the editor. Here, simply click on a string and add a translation for it underneath:
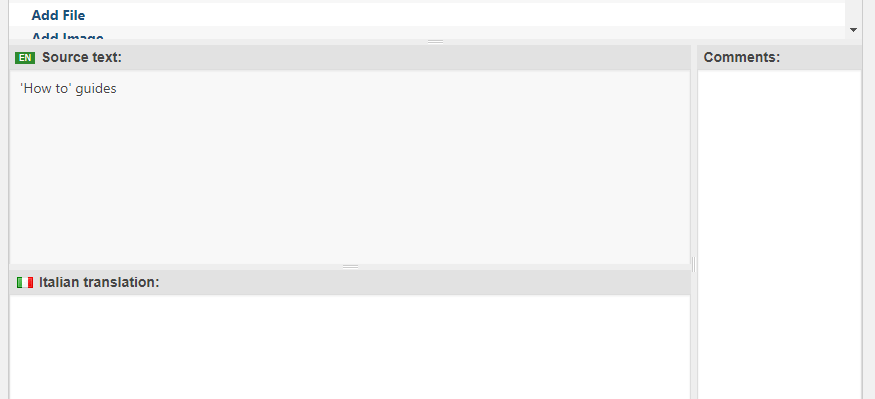
You can also use the Comments section to the right to save notes for yourself or anyone else working on your translations, to avoid confusion. The editor is simple to use, so you just need to remember to click the Save button at the top of the screen from time to time, so your work doesn’t get lost by mistake if you close the tab.
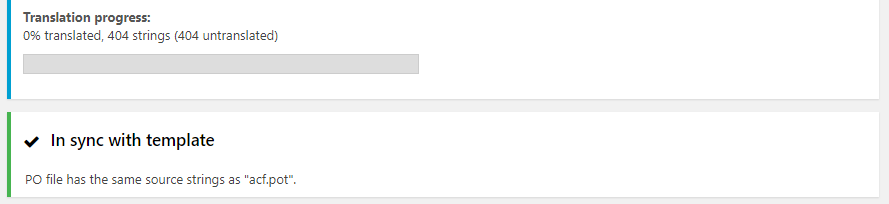
You can also peek at the File Info tab from time to time if you want to check your progress. The plugin keeps count of how many strings you’ve translated and how many you have to go at all times:
Keep in mind – you’ll need to change your dashboard’s language to use any of your translated plugins. To do this, just go to the General > Settings tab and look for the Site Language setting:
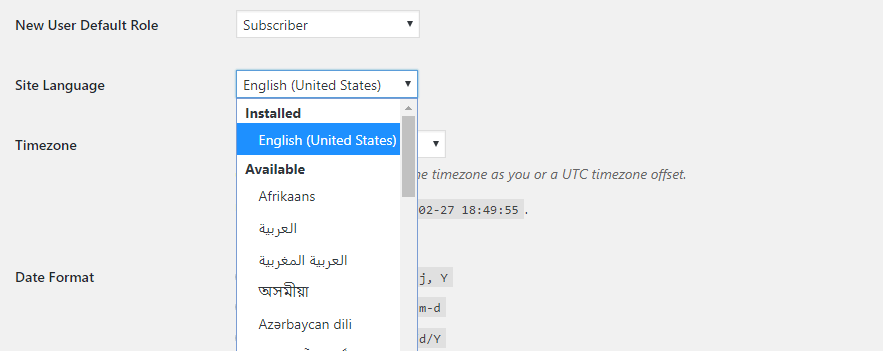
Pick the language you want from the drop-down menu and save your changes. If your plugins have translations available for your new language, WordPress will now use them by default.
Conclusion
Helping translate WordPress plugins is one of the best ways you can contribute to the platform’s growth. The higher number of plugins available in other languages, the more people will be able to build amazing websites. Some of them might help translate plugins to other languages too!
When it comes to translating plugins, you can either contribute directly through the WordPress Plugin Directory or work on your own website with these three steps:
- Install Loco Translate and pick a plugin to translate.
- Choose a language and create a po file for your plugin.
- Get to work on translating your plugin’s strings.